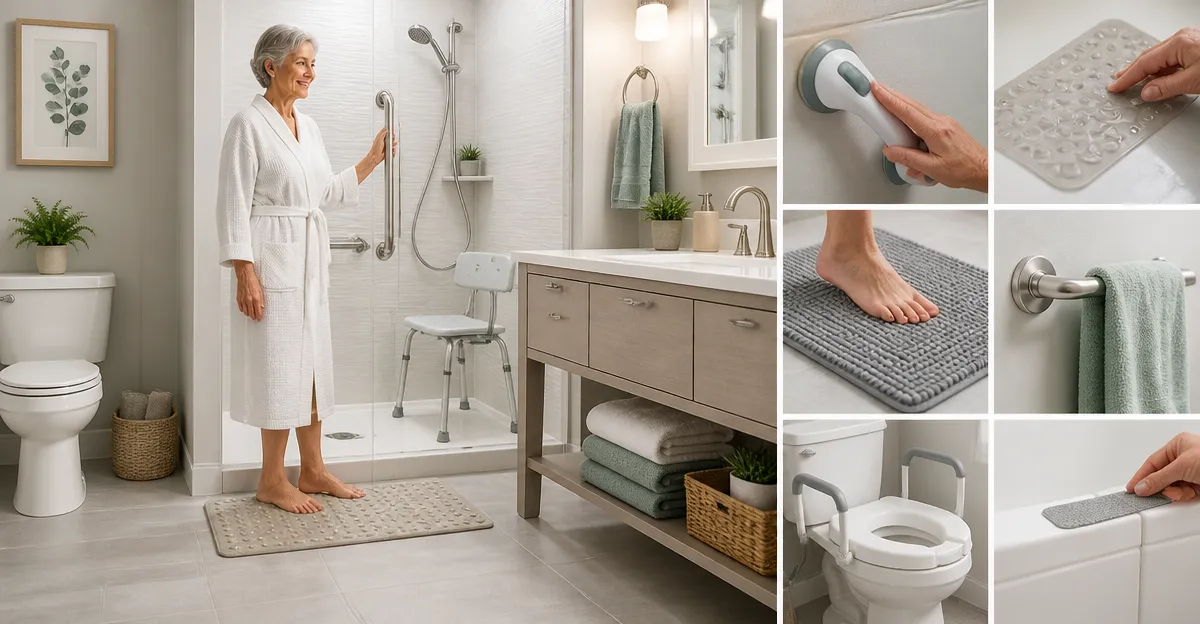
How to Create a Renter‑Friendly, Non‑Slip Bathroom for Seniors: 10 Easy, Damage‑Free Safety Ideas
Introduction
One of the most common concerns for seniors living in rental homes is bathroom safety. Slippery floors, high tubs, and hard‑to‑reach fixtures can increase the risk of falls, which often lead to serious injuries. This guide explains ten practical, damage‑free modifications that improve stability without violating lease agreements. By following each step, one can create a senior‑friendly bathroom that feels secure, comfortable, and compliant with landlord expectations.
The recommendations combine low‑cost materials, simple installation techniques, and a single purpose‑built product that eliminates the need for drilling or permanent alterations. Readers will learn how to assess their space, select appropriate tools, and maintain a safe environment over the long term. The result is a bathroom that supports independence while protecting both occupants and property.
What You’ll Need
- Cleaning supplies (isopropyl alcohol, microfiber cloths)
- Adhesive‑backed non‑slip mats or stickers
- Water‑resistant anti‑slip paint (optional)
- Rubber‑capped bathtub liner (optional)
- LED vanity light strips or motion‑sensor bulbs
- Adjustable toilet seat riser
- LEVERLOC 12-inch Suction Grab Bars (2‑Pack)
All items can be purchased without permanent installation, making them ideal for renters. The only product that requires a specific recommendation is the LEVERLOC grab bars, which provide reliable support on smooth, non‑porous surfaces without drilling.
Step 1: Conduct a Safety Audit of the Existing Space
Begin by walking through the bathroom and noting any surfaces that feel slick when wet. Pay special attention to the bathtub, shower floor, and tile grout lines, as these areas often retain water. Record the height of the tub edge and the distance between the toilet and sink, because excessive reach can cause loss of balance. Finally, assess lighting levels; inadequate illumination frequently contributes to missteps.
Documenting these observations creates a clear roadmap for the subsequent modifications. It also helps landlords understand why each change is necessary, which can smooth the approval process.
Step 2: Choose a Non‑Slip Flooring Solution That Leaves No Residue
Adhesive‑backed non‑slip mats are an excellent choice for renters because they adhere securely yet peel away cleanly when the lease ends. Select mats that are rated for wet environments and that cover the entire shower floor to prevent water pooling. Position the mat so that its edges are flush with the tub lip, eliminating tripping hazards.
For tiled surfaces where a mat may be undesirable, consider non‑slip stickers that bond to tile grout. These stickers provide a textured surface while remaining invisible when dry, preserving the bathroom’s aesthetic.
Step 3: Apply a Water‑Resistant Anti‑Slip Coating (Optional)
If the landlord permits a temporary paint solution, a water‑resistant anti‑slip coating can be brushed onto tile or vinyl floors. The coating contains fine grit that creates friction underfoot, dramatically reducing slip risk. Follow the manufacturer’s drying time instructions, and test a small area first to ensure no discoloration occurs.
Because the coating dries to a thin, flexible film, it does not damage the underlying surface and can be removed with a standard floor cleaner when the tenancy concludes.
Step 4: Install a Rubber‑Capped Bathtub Liner
A bathtub liner made of silicone or rubber adds a cushioned layer that prevents the skin from contacting cold, hard porcelain. The liner adheres via suction cups or a gentle adhesive that does not leave marks. Choose a liner that matches the tub’s dimensions and that can be removed without tools.
Beyond slip reduction, the liner provides a warm surface, which is especially beneficial for seniors with circulation issues. It also protects the original tub finish from scratches caused by daily use.
Step 5: Upgrade the Showerhead to a Handheld Model
A handheld showerhead offers greater control over water direction, allowing the user to sit while rinsing. Most handheld units attach to existing plumbing with a simple slip‑on connector, eliminating the need for professional installation. Look for models with a pause function, which helps conserve water and reduces the need to constantly adjust the handle.
While this step does not involve a specific product recommendation, it illustrates how a small equipment change can enhance safety and comfort without altering the property.
Step 6: Secure a Reliable Grab Bar Using Suction Technology
One of the most effective ways to prevent falls is to install a sturdy grab bar within easy reach of the bathtub and shower. The LEVERLOC 12-inch Suction Grab Bars provide a damage‑free solution because they attach via powerful suction cups rather than drilling.
Each bar measures 12.2 inches, offering enough length for a two‑hand grip. The anti‑slip strip on top creates friction, while the curved wave design on the bottom ensures a comfortable finger hold. Installation requires only a clean, airtight surface such as tile, marble, or glass; press the bar for five seconds, lock the latches, and it is ready for use. Removal is equally simple: release the latches, peel away the suction cup, and clean the surface with water.
At a price of $29.74 and a rating of 4.4 out of 5 stars from 1,508 reviews, these grab bars deliver high value. They are ideal for renters because they leave no holes, no residue, and can be repositioned as needed. The product’s reusable nature also makes it a cost‑effective safety investment for multiple rental properties.
Step 7: Add a Raised Toilet Seat for Easier Transfers
A raised toilet seat reduces the distance a senior must lower themselves, decreasing strain on the knees and hips. Choose a seat with rubber feet that grip the existing toilet bowl without adhesives. Installation involves snapping the seat onto the existing one, a process that takes less than five minutes.
Because the seat is removable, it complies with most lease agreements. It also improves hygiene by providing a stable platform that minimizes wobble.
Step 8: Enhance Lighting to Eliminate Dark Corners
Proper illumination is essential for identifying hazards such as wet spots or uneven tiles. Install LED vanity light strips under the cabinet or around the mirror; these strips use adhesive backing that can be removed without damage. Motion‑sensor bulbs for the ceiling light ensure that the space is automatically lit when the door opens.
Bright, evenly distributed light reduces the likelihood of missteps, especially during nighttime bathroom visits. Energy‑efficient LEDs also keep utility costs low, which is beneficial for budget‑conscious renters.
Step 9: Create a Bathroom Safety Checklist for Ongoing Maintenance
Safety is an ongoing process; regular inspections help catch emerging issues before they become dangerous. Develop a checklist that includes testing the suction grip of the grab bars weekly, verifying that non‑slip mats remain firmly attached, and confirming that lighting functions correctly.
Document any changes, such as water damage or loose fixtures, and address them promptly. Sharing the checklist with a caregiver or family member ensures accountability and reinforces safe habits.
Step 10: Perform Routine Cleaning and Re‑Evaluation
Consistent cleaning maintains the effectiveness of non‑slip surfaces. Use a mild cleanser on the suction cups of the grab bars to prevent residue buildup, which could weaken adhesion. After each deep‑cleaning session, re‑test the bars by applying pressure to ensure they remain secure.
Periodically reassess the bathroom as the senior’s mobility changes. Adjust the placement of grab bars, replace worn mats, or add additional lighting as needed. This proactive approach extends the lifespan of all safety modifications.
Tips & Pro Tips
- Always test suction cups on a small area first; if the surface is porous, the grip may be insufficient.
- Use a hairdryer to warm the suction cup before installation; this improves seal strength on glass.
- Place non‑slip mats slightly overlapping the tub lip to prevent water from seeping underneath.
- When using anti‑slip paint, apply a second coat after the first has dried to maximize traction.
- Keep a spare set of suction grab bars in a storage box; they can be swapped out if one loses suction over time.
Troubleshooting
Problem: The grab bar does not stay attached after a few days.
Solution: Clean the surface with isopropyl alcohol to remove soap residue, then dry thoroughly. Re‑press the bar for five seconds before locking the latches. If the surface is textured, consider using a small amount of silicone sealant around the suction cup edge (apply sparingly and test for removal ease).
Problem: Non‑slip mats peel at the edges.
Solution: Apply a thin line of double‑sided carpet tape beneath the mat edges; this tape can be removed without leaving adhesive residue.
Conclusion
Creating a renter‑friendly, non‑slip bathroom for seniors does not require permanent construction or expensive renovations. By following the ten steps outlined above, one can implement damage‑free modifications that dramatically improve safety and confidence. The use of the LEVERLOC 12-inch Suction Grab Bars exemplifies how a single, well‑designed product can replace invasive hardware while delivering reliable support.
Readers are encouraged to assess their own bathroom, select the appropriate tools, and commit to regular maintenance. A safer bathroom not only protects seniors from falls but also enhances their independence, allowing them to enjoy daily routines with peace of mind.
Products Mentioned in This Guide
Frequently Asked Questions
What non‑slip solutions can be added to a rental bathroom without drilling?
Use adhesive‑backed anti‑slip mats, stickers, or removable grip pads that stick to tile or vinyl and can be peeled off cleanly.
How can seniors improve bathtub safety in a rented home?
Place a non‑slip bathtub liner or a removable rubber mat inside the tub and add a sturdy, suction‑cup grab bar that doesn’t require screws.
Are there any lease‑friendly ways to add grab bars?
Yes, use tension‑mount or suction‑cup grab bars that clamp to walls and leave no permanent marks when removed.
What inexpensive flooring options help prevent falls?
Lay peel‑and‑stick anti‑slip vinyl tiles or interlocking foam floor tiles that provide traction and are easy to remove at move‑out.
How often should the anti‑slip surfaces be cleaned?
Wipe them with isopropyl alcohol and a microfiber cloth weekly to maintain grip and prevent soap buildup.