How to Transition from a Cane to a Rollator Safely: A Step-by-Step Guide for Elderly Mobility
Introduction
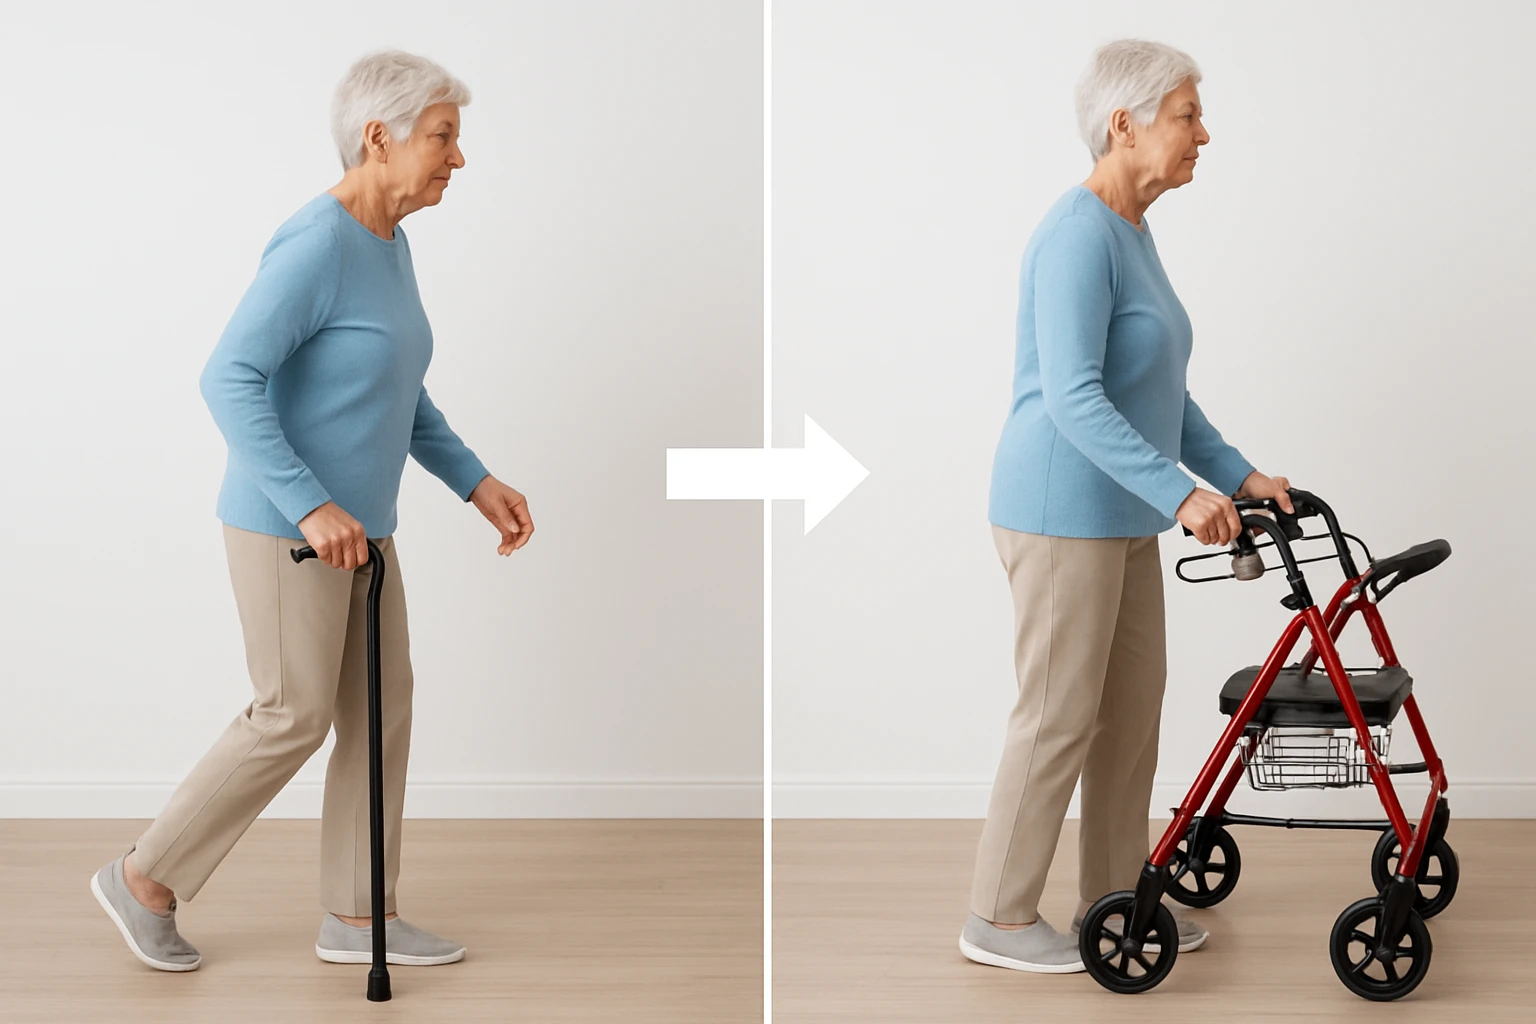
One will discover how to replace a cane with a rollator while preserving independence and reducing fall risk. The guide explains the assessment, selection, practice, and maintenance phases required for a smooth transition. Readers will learn why a rollator such as the Drive Medical Nitro Rollator can enhance stability and comfort. By following each step, one can achieve confidence in everyday mobility.
What You’ll Need
- Current cane and any accessories.
- Protective footwear with non‑slip soles.
- Comfortable clothing that allows free leg movement.
- Drive Medical Nitro Rollator (recommended rollator model).
- Optional: lightweight backpack for personal items.
Step 1: Assess Current Mobility and Health Status
The first step involves a thorough evaluation of balance, strength, and endurance with the help of a healthcare professional. One should record any pain points, gait irregularities, or limitations observed while using the cane. This information guides the selection of a rollator that matches the individual's load‑bearing capacity and terrain needs. Understanding personal health status also informs the pace at which the transition should occur.
Step 2: Choose an Appropriate Rollator
When selecting a rollator, one must prioritize stability, weight capacity, and ease of folding for storage. The Drive Medical Nitro Rollator offers a lightweight aluminum frame that supports up to 350 lb, making it suitable for most seniors. Its large 10‑inch front wheels provide smooth navigation on uneven surfaces, while the contoured padded seat offers a restful pause during outings. The product’s adjustable backrest, advanced braking system, and three bag‑mounting positions address both safety and convenience, justifying its 4.4‑star rating from over 2,200 reviewers.
Step 3: Familiarize Yourself with the Rollator Controls
Before abandoning the cane, one should practice using the rollator in a safe, open area such as a living room or hallway. Begin by adjusting the handle height so that elbows are slightly bent when the hands rest on the grips, which promotes ergonomic posture. Test each braking mode—free, slowdown, and park—to understand how the system responds on inclines and flat ground. Mastery of the brakes reduces the likelihood of sudden stops and enhances confidence during outdoor excursions.
Step 4: Practice Basic Maneuvers While Maintaining Cane Support
During the initial practice sessions, one may hold the cane in the opposite hand to the rollator for added stability. Walk short distances, focusing on synchronized movement of the rollator wheels and cane stride, then gradually increase the length of each walk. When comfortable, transition to using only the rollator, remembering to keep the seat within easy reach for occasional rests. This staged approach minimizes the shock to muscles and joints while building trust in the new device.
Step 5: Incorporate the Rollator into Daily Routines
Once proficiency is achieved, one should integrate the rollator into regular activities such as grocery shopping, garden visits, and community outings. The rollator’s three bag‑mounting positions allow essential items like a phone, medication, or water bottle to remain accessible, reducing the need to stop frequently. Adjust the seat height before longer trips to ensure that sitting down does not strain the knees or back. Consistent use reinforces balance improvements and encourages a more active lifestyle.
Tips & Pro Tips
- Inspect the brake levers before each outing; worn pads can compromise stopping power.
- Keep the rollator wheels clean and lubricated to maintain smooth rolling on indoor surfaces.
- Wear a lightweight, breathable jacket with reflective strips for visibility during early morning or evening walks.
- Schedule periodic professional assessments to adjust handle height and seat position as flexibility changes.
Troubleshooting
Problem: The rollator feels unstable on carpeted floors.
Solution: Engage the slowdown brake mode to reduce speed, and consider adding a non‑slip rubber pad to the rear wheels for added traction.
Problem: The seat height is uncomfortable after prolonged use.
Solution: Adjust the seat lever according to the manufacturer’s instructions, ensuring that the hips are slightly higher than the knees when seated.
Conclusion
By following the outlined steps, one can transition from a cane to a rollator with safety, confidence, and independence. The guide emphasizes assessment, proper product selection, controlled practice, and ongoing maintenance to ensure lasting mobility benefits. Seniors who adopt a rollator such as the Drive Medical Nitro Rollator often experience reduced fatigue and increased willingness to engage in community activities. Continued use, combined with regular health reviews, will sustain the improvements achieved through this transition.
Products Mentioned in This Guide
Frequently Asked Questions
When is it appropriate for an elderly person to switch from a cane to a rollator?
A switch is recommended when balance, strength, or endurance decline enough that a cane no longer provides sufficient support, as confirmed by a healthcare professional.
What features should I look for when choosing a rollator for seniors?
Key features include a sturdy frame, comfortable hand grips, adjustable height, a reliable braking system, and a weight‑capacity that exceeds the user’s body weight.
How can I safely practice using a rollator for the first time?
Start on a flat, obstacle‑free surface, adjust the frame to hip height, and take short, controlled steps while holding the brakes until confidence builds.
What footwear is best for using a rollator?
Wear supportive shoes with non‑slip soles that fit snugly and provide good ankle stability.
How often should a rollator be inspected and maintained?
Inspect the rollator weekly for loose bolts, worn wheels, and brake function, and perform a thorough cleaning and lubrication monthly.