How to Install Threshold Ramps Inside Your Home: Step-by-Step DIY Guide for Smooth, Safe Doorway Transitions
Introduction
Providing barrier‑free access within a residence is essential for seniors, wheelchair users, and anyone with limited mobility. This guide explains how to install threshold ramps inside your home, creating a smooth, slip‑resistant transition between rooms or at exterior doors. Readers will learn how to assess the doorway, select the appropriate ramp, prepare the surface, secure the ramp, and maintain it for long‑term safety. By following the step‑by‑step instructions, one can achieve a professional‑grade result without hiring a contractor.
What You’ll Need
- Measuring tape and level
- Cleaning supplies (vacuum, mild detergent)
- Recommended ramp (see product recommendations below)
- Optional securing hardware (rubber‑backed adhesive, bolts, or anti‑slip tape)
- Safety gloves and eye protection
Step-by-Step Instructions
Step 1: Measure the Threshold Height and Width
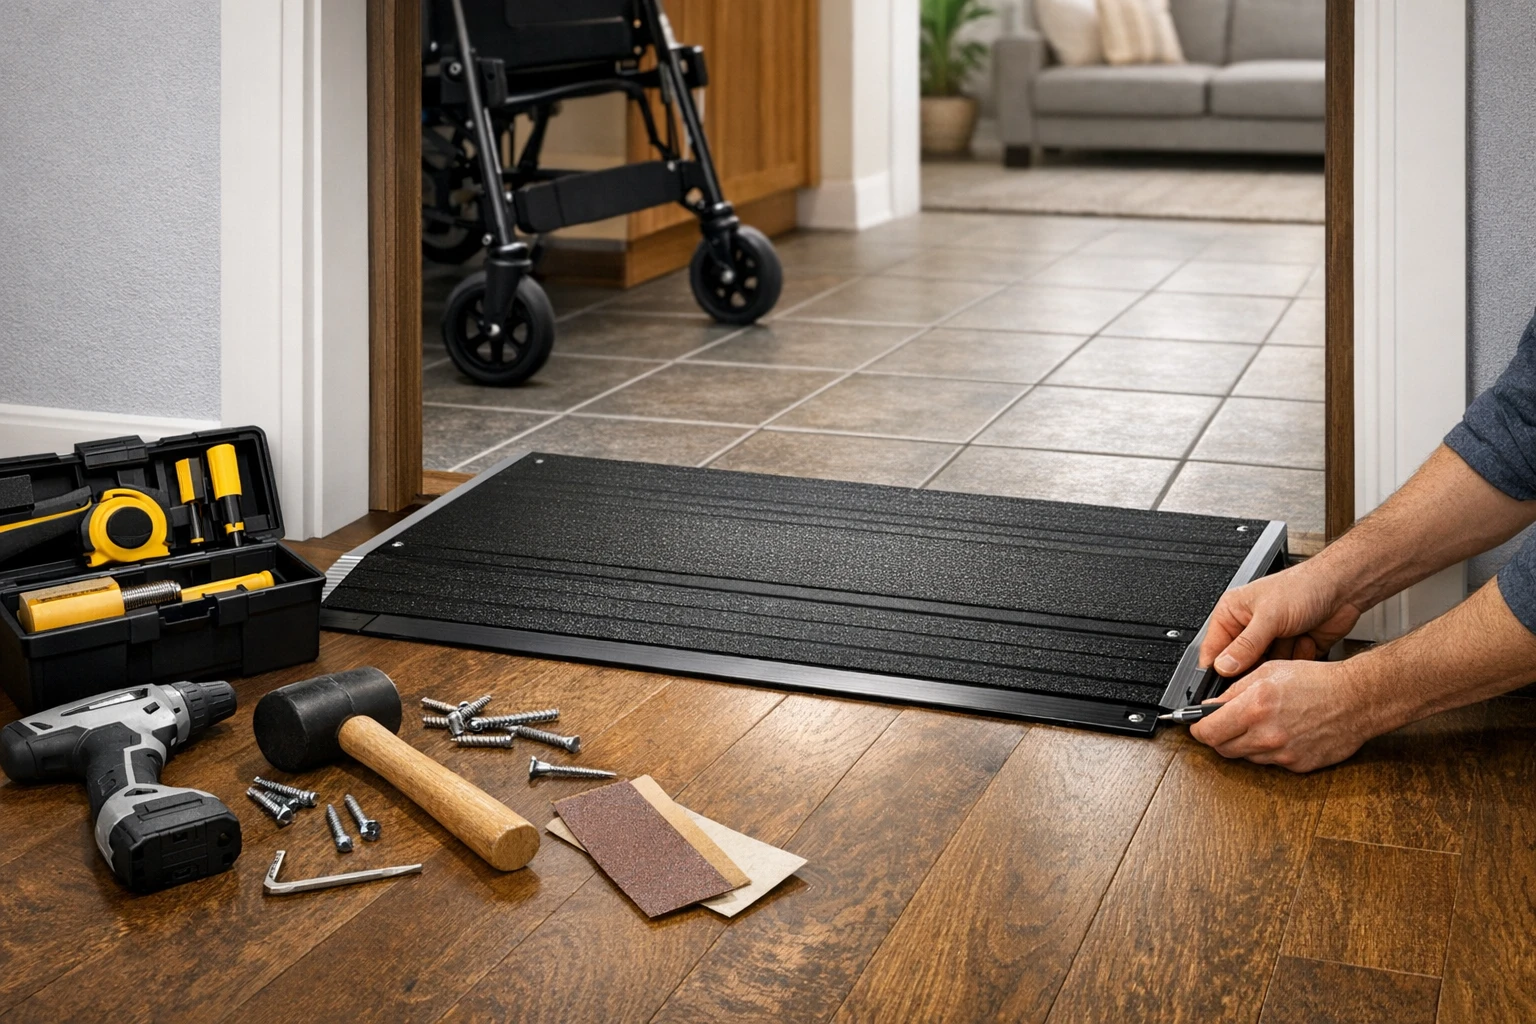
Accurate measurements are the foundation of a successful installation. Use a steel tape to determine the vertical rise of the threshold (typically 0.5"‑3") and the horizontal opening width. Record both dimensions; they will dictate the ramp rise and length needed. For example, a 3" rise over a 35" width matches the specifications of the VEVOR 3" Rubber Threshold Ramp, which is designed for thresholds up to 3" high.
Step 2: Choose the Appropriate Ramp Type
Three common materials are available:
- Rubber ramps offer flexibility, weather resistance, and a non‑slip surface. They are ideal for indoor doorways and light outdoor use.
- Aluminum ramps provide a rigid, lightweight solution with modular sections for custom widths.
- Folding aluminum ramps are portable and useful for temporary installations or multi‑room applications.
For a permanent indoor solution, the VEVOR 3" Rubber Threshold Ramp is recommended because its beveled edges ease the approach from either side, and its 2200 lb load capacity exceeds typical residential needs. If a modular, adjustable width is required, consider the Nuvium 3" Aluminum Threshold Ramp, which can be assembled in multiple sections to fit wider doorways.
Step 3: Prepare the Installation Surface
Remove carpet, debris, and any loose flooring around the threshold. Clean the area with a mild detergent and allow it to dry completely. A clean surface ensures optimal adhesion for ramps that rely on friction or self‑adhesive backing. The VEVOR 3" Rubber Threshold Ramp does not require bolts, but a clean floor maximises its grip.
Step 4: Position the Ramp and Verify Fit
Place the ramp against the threshold, aligning the beveled edges with the floor on both sides. Walk the length of the ramp to confirm a smooth transition; there should be no noticeable gaps or steps. If the ramp is slightly too long, the VEVOR model can be trimmed with a utility knife because it is made of rubber. For the aluminum Nuvium ramp, adjust the modular connectors until the width matches the opening.
Step 5: Secure the Ramp
Although many rubber ramps stay in place through weight, securing them prevents movement in high‑traffic areas. The VEVOR ramp includes optional screws; if you prefer a tool‑free solution, a strip of heavy‑duty double‑sided rubber tape can be applied beneath the ramp. For the Nuvium aluminum ramp, the included plastic connectors lock the sections together, and the underside anti‑skid mat provides additional stability. Both products have high user ratings—VEVOR 4.6/5 (1,879 reviews) and Nuvium 4.5/5 (150 reviews)—indicating reliable performance when installed correctly.
Step 6: Add Safety Enhancements
Enhance visibility and traction by attaching reflective strips or anti‑slip tape to the ramp surface. The FACHNUO 2ft Folding Wheelchair Ramp includes reflective side strips and a textured aluminum surface, making it an excellent reference for safety features. Even if you choose a rubber ramp, applying a thin line of high‑visibility tape at the ramp’s midpoint alerts users in low‑light conditions.
Step 7: Trim or Adjust the Ramp to Fit Custom Openings
If the threshold width exceeds the standard ramp size, the rubber ramps from Henka 1.2" Rubber Threshold Ramp can be cut to length. This model is advertised as cuttable, allowing users to splice multiple pieces together for wider doorways. Use a straight edge and a sharp utility knife, then sand the cut edge lightly to prevent sharpness.
Step 8: Final Inspection and Ongoing Maintenance
After securing the ramp, walk it repeatedly with a wheelchair or walker to confirm stability. Check that the ramp does not shift under load and that the beveled edges remain smooth. Periodically wipe the surface with a damp cloth to remove dust; rubber ramps may accumulate grit that reduces traction. Re‑apply anti‑slip tape annually, especially in humid climates where rubber can become slick.
Tips & Pro Tips
- Measure twice, order once: Verify height and width before purchasing to avoid returns.
- Use a level: Ensure the ramp sits flat; a tilted ramp can cause wheelchairs to tip.
- Consider weight capacity: For heavy power chairs, choose a ramp with a load rating of at least 1,800 lb (VEVOR 2,200 lb rating provides ample safety margin).
- Weatherproofing: Rubber ramps are naturally weather‑resistant, but for outdoor exposure, seal the edges with a silicone bead to prevent water ingress.
- Portable backup: Keep a folded FACHNUO 2ft Folding Wheelchair Ramp in the garage for temporary steps or when visiting friends.
Troubleshooting
- Ramp slides on smooth tile: Apply a non‑slip rug pad underneath or use the supplied bolts (VEVOR) to anchor the ramp.
- Rubber odor persists: Air the ramp in a well‑ventilated area for 24‑48 hours; the smell typically dissipates quickly.
- Ramp feels too stiff: If using the aluminum Nuvium model, ensure the anti‑skid mat is fully engaged; a missing mat can create a hard feel.
Conclusion
Installing a threshold ramp inside your home transforms a potential obstacle into a seamless passage, enhancing independence and safety for all occupants. By measuring accurately, selecting the appropriate material, preparing the surface, and securing the ramp, one can achieve a durable, slip‑resistant solution. The recommended products—VEVOR rubber ramp, Nuvium aluminum ramp, FACHNUO folding ramp, Henka cuttable ramp, and Ruedamann rubber door ramp—provide a range of options to suit different budgets and architectural constraints. With regular maintenance, the ramp will serve reliably for years.
Products Mentioned in This Guide
Frequently Asked Questions
What measurements are needed before installing an indoor threshold ramp?
Measure the height of the threshold and the width of the doorway using a steel tape to ensure the ramp fits correctly.
How do I choose the right type of threshold ramp for my home?
Select a ramp with a suitable rise, length, and slip‑resistant surface based on the measured height and the traffic level of the doorway.
What tools and materials are required for a DIY threshold ramp installation?
You’ll need a measuring tape, level, cleaning supplies, the chosen ramp, optional securing hardware (adhesive, bolts, or anti‑slip tape), and safety gloves and eye protection.
How should the ramp be secured to prevent movement?
Clean the surface, then attach the ramp using rubber‑backed adhesive, bolts, or anti‑slip tape according to the manufacturer’s instructions.
What maintenance steps keep the ramp safe over time?
Regularly clean the ramp, inspect the fasteners for loosening, and reapply anti‑slip tape or adhesive as needed to maintain traction.